How to Remove a Background in Canva

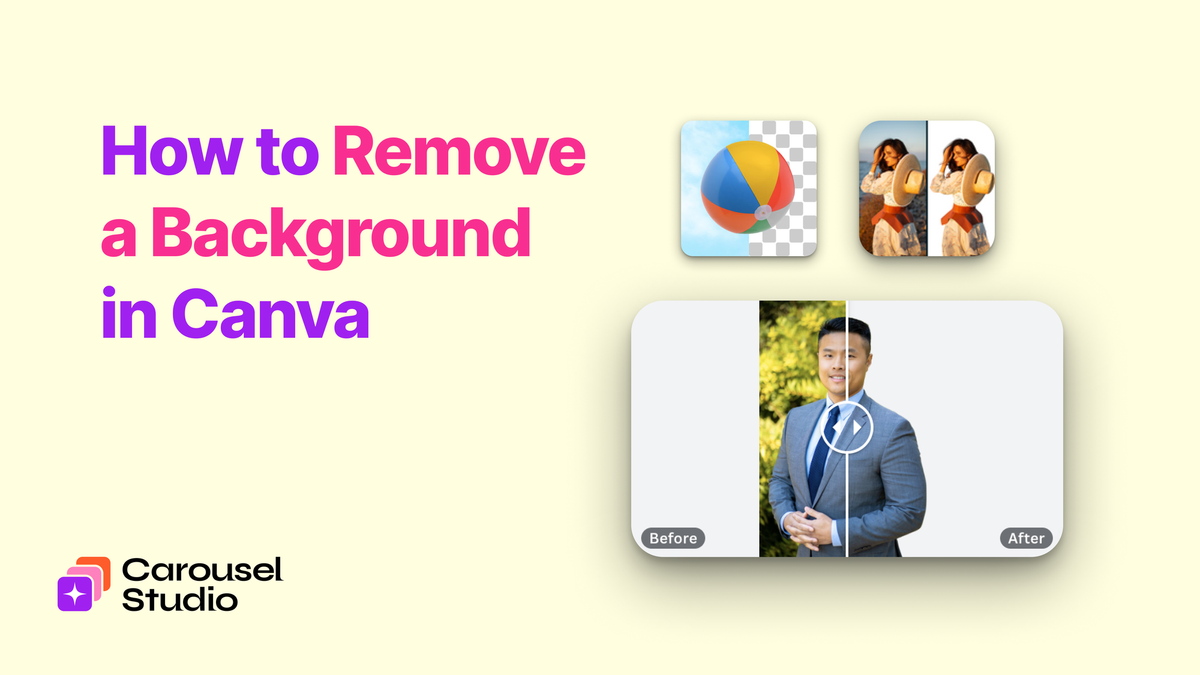
A clean, background-free image can do a lot of work in a design. It keeps the focus on the subject, makes your visuals feel more intentional, and gives you the flexibility to drop your product, your headshot, or any asset onto any background you choose.
You don't need Photoshop for this. Canva has built-in background removal tools, and there are also free third-party apps in the Canva App Marketplace that get the job done well. Whether you're on a paid plan or using Canva for free, there's a method here that'll work for you.
Method 1: Canva's Built-In Background Remover (Canva Pro)
Canva's Background Remover is the quickest option for Pro users. It works in a single click and handles most images cleanly without any manual input.
Note: The Background Remover is a Canva Pro feature. If you're on the free plan, skip to Method 2 below.
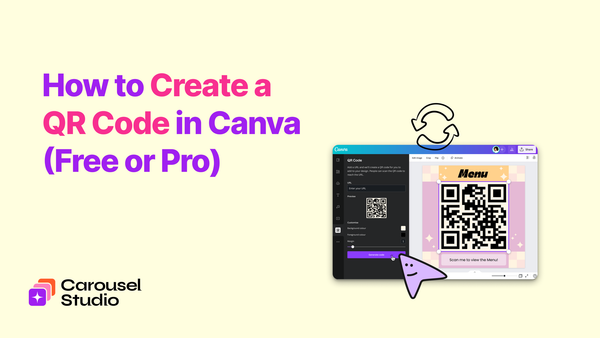
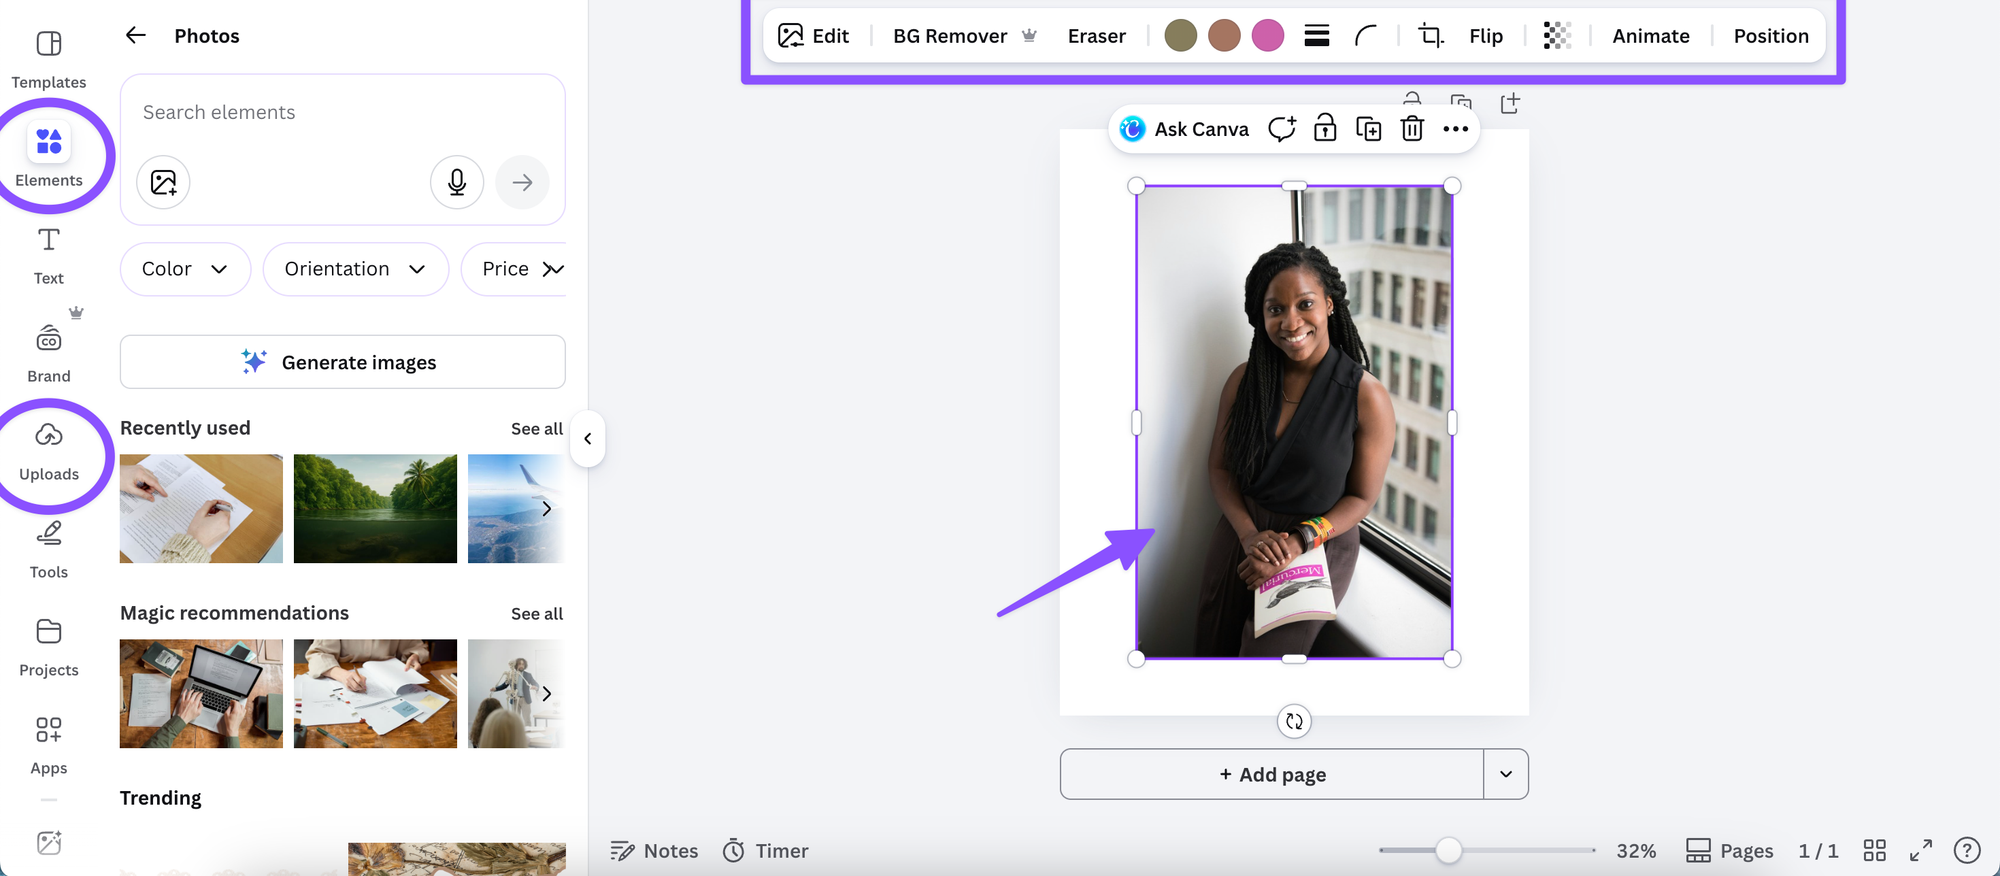
Step 1: Open your design and add your image
Start inside any Canva design. Upload your image or select one already in your media library, then drag it onto your canvas.
Step 2: Select the image
Click on the image to select it. You'll see the toolbar appear along the top of your screen.
Step 3: Click "Edit image"
In the toolbar, click Edit image. This opens the image editing panel on the left side of your screen.
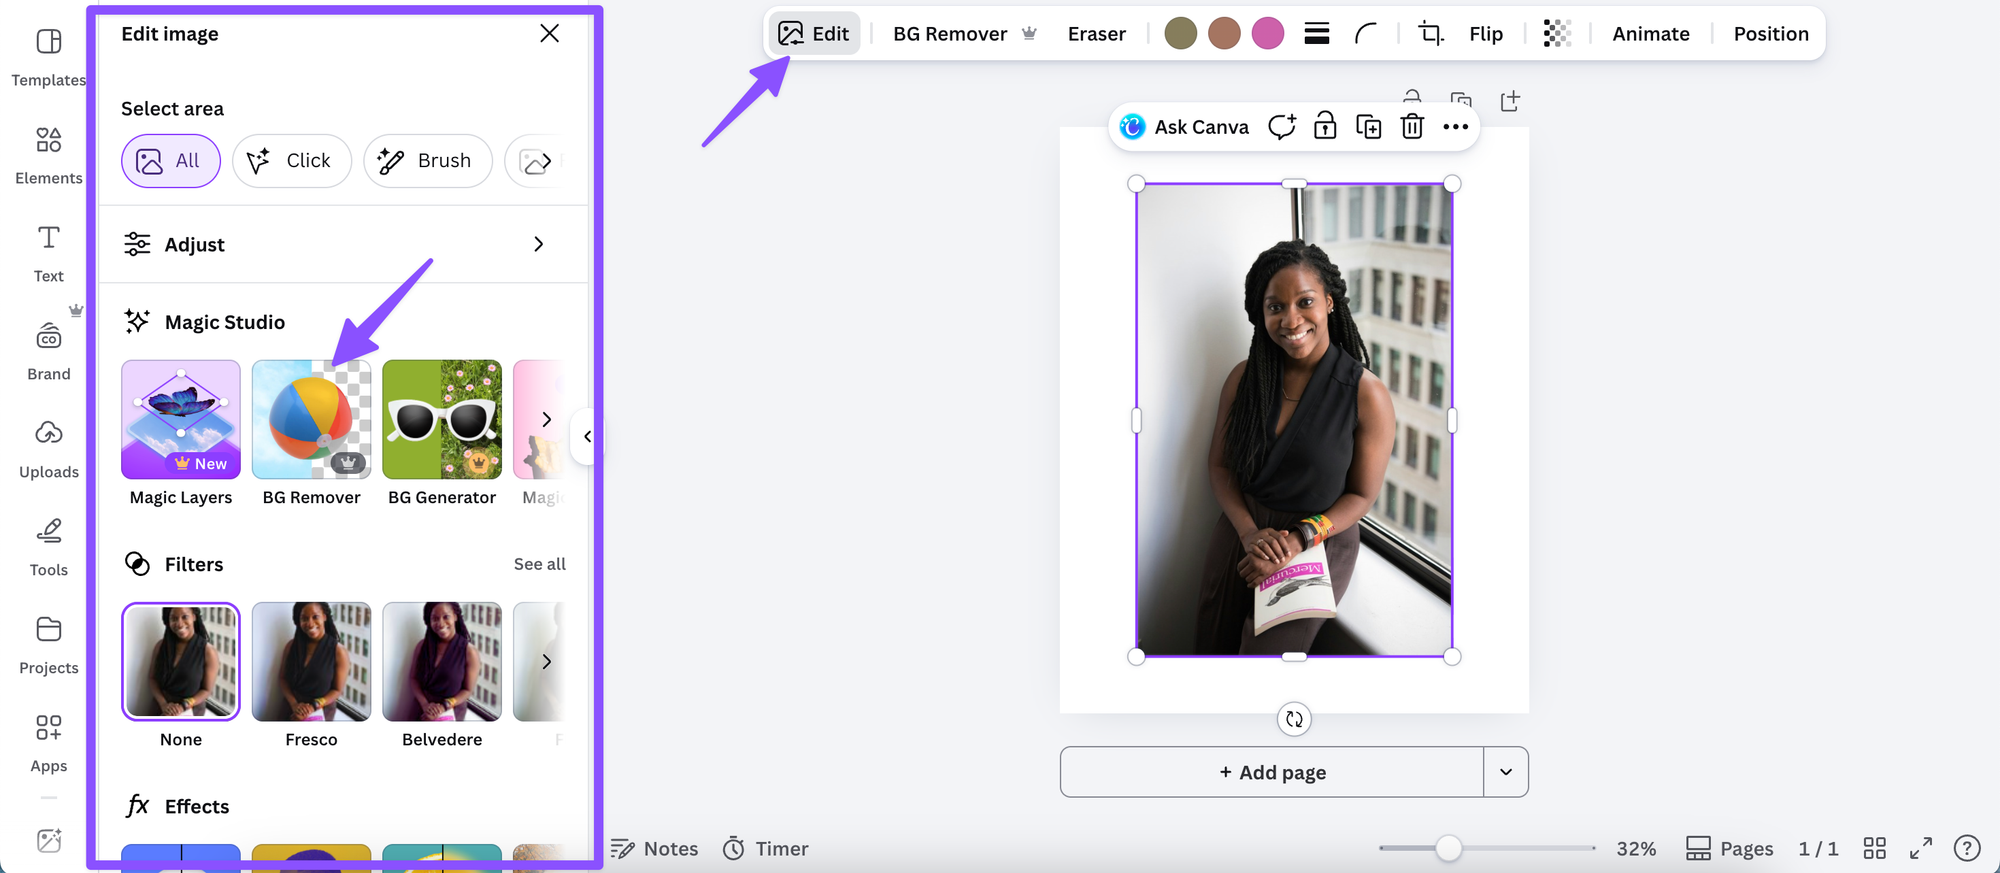
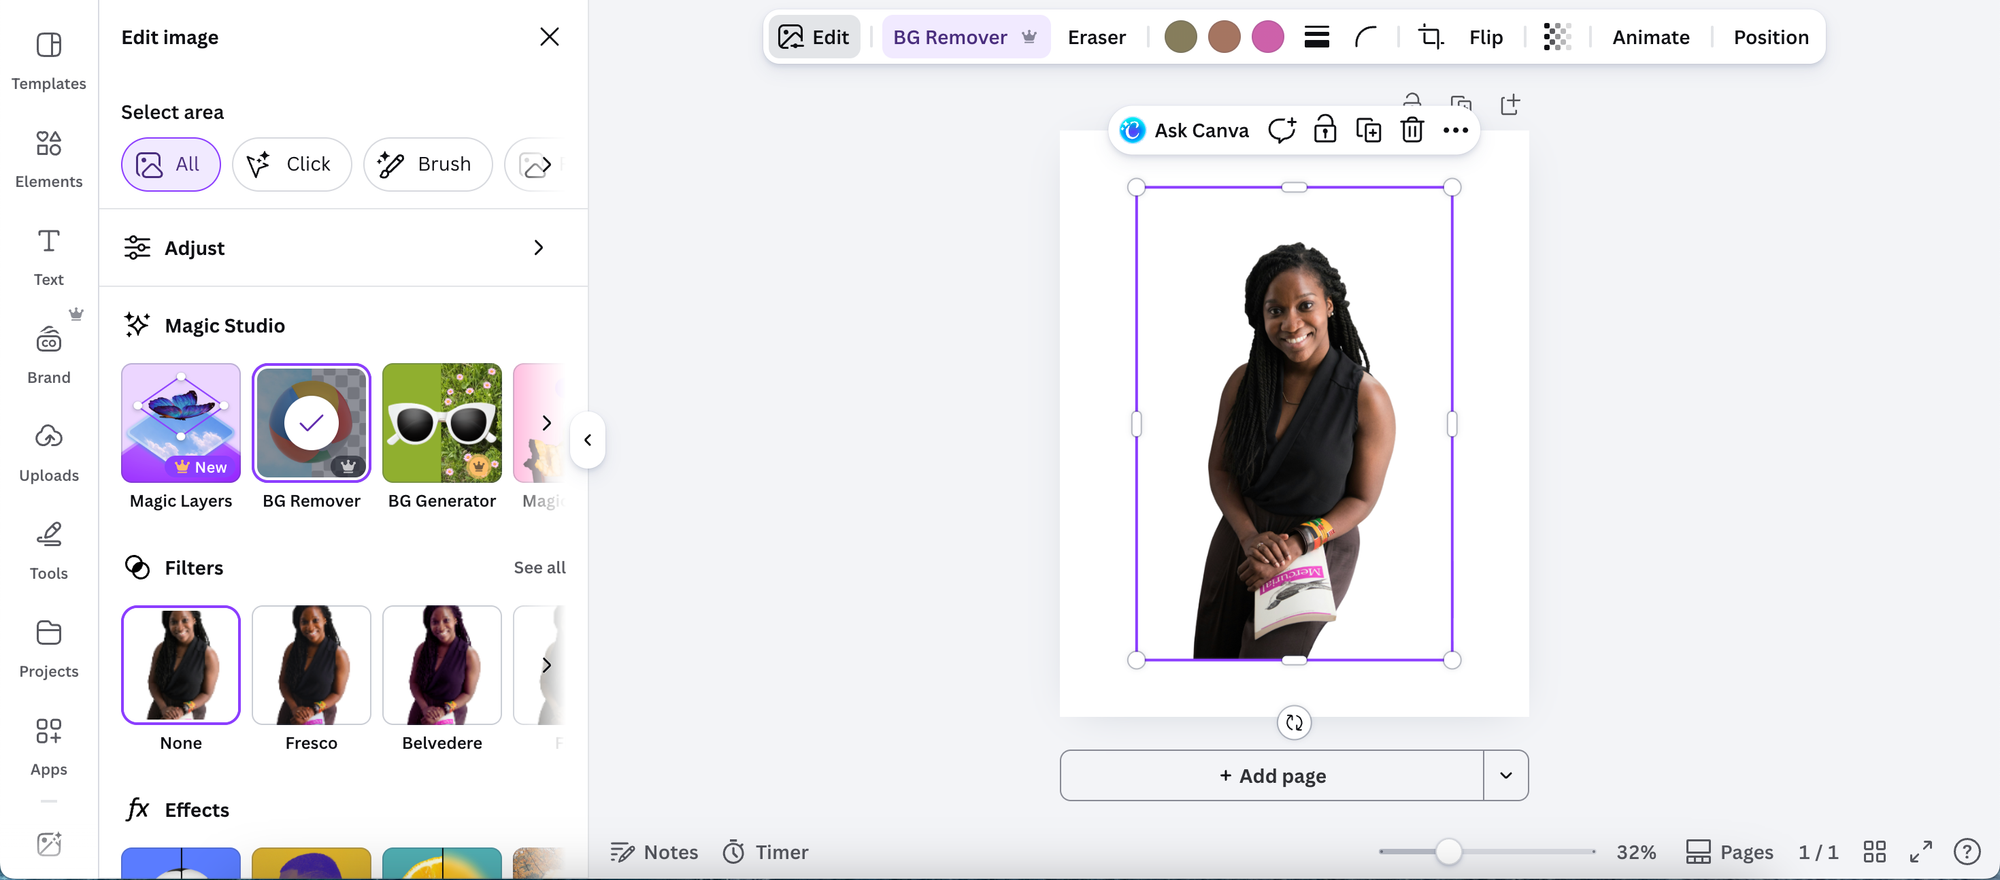
Step 4: Click "BG Remover"
In the editing panel, you'll see a BG Remover button near the top. Click it and Canva will automatically detect and remove the background, usually within a few seconds.
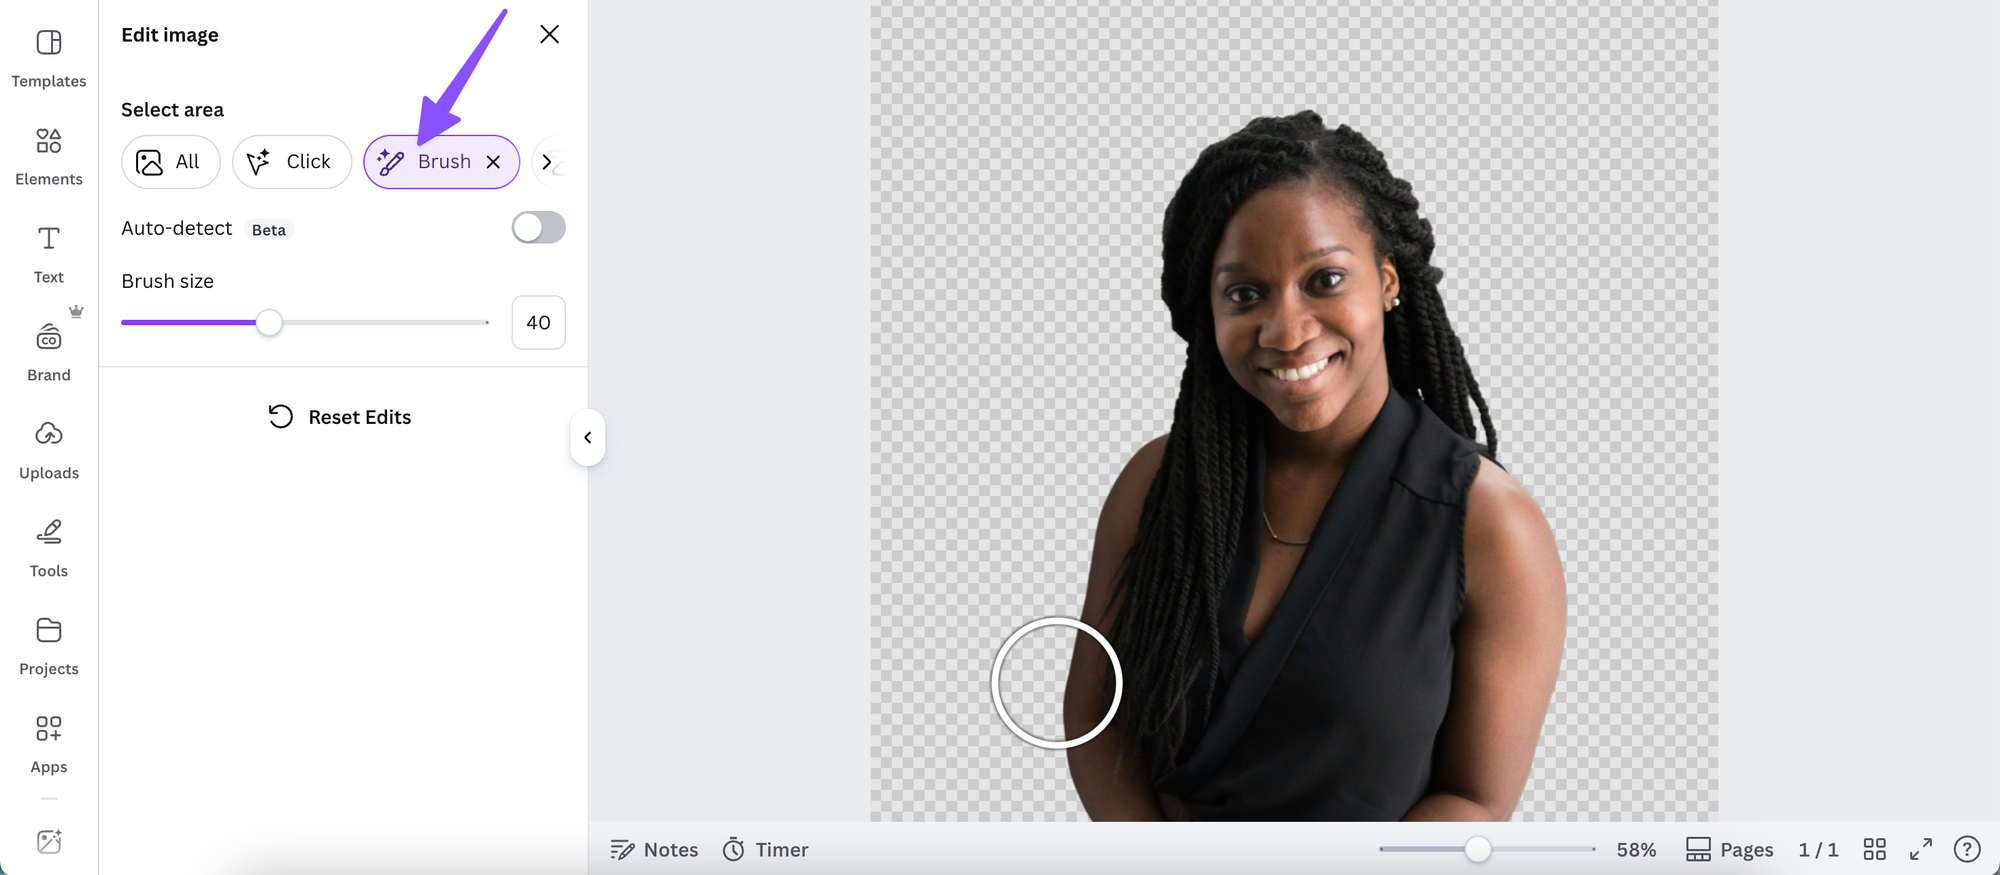
Step 5: Refine if needed
Once the background is removed, you may want to clean up any stray areas. Use the Erase brush to remove anything that was missed, or the Restore brush to bring back parts that were removed by mistake. Adjust the brush size for more precise control around detailed edges.
Step 6: Apply and use your image
Click Apply and your background-free image is ready to use. You can now place it on any background, coloured shape, or new design.
Method 2: Background Removal Apps in the Canva App Marketplace
Not on Canva Pro? Not a problem. The App Marketplace has several free background removal tools that integrate directly into your Canva workflow. Here's how to use one.
Step 1: Open the Apps tab
Inside any Canva design, click the Apps tab in the left sidebar.

Step 2: Search for a background removal app
Type "background remover" or "remove background" in the search bar. You'll see a range of third-party apps to choose from. Background Removit is one of the most popular and reliable options. It offers you 2 free credits and you can buy a monthly subscription for CA$7.49 a month to continue using it.
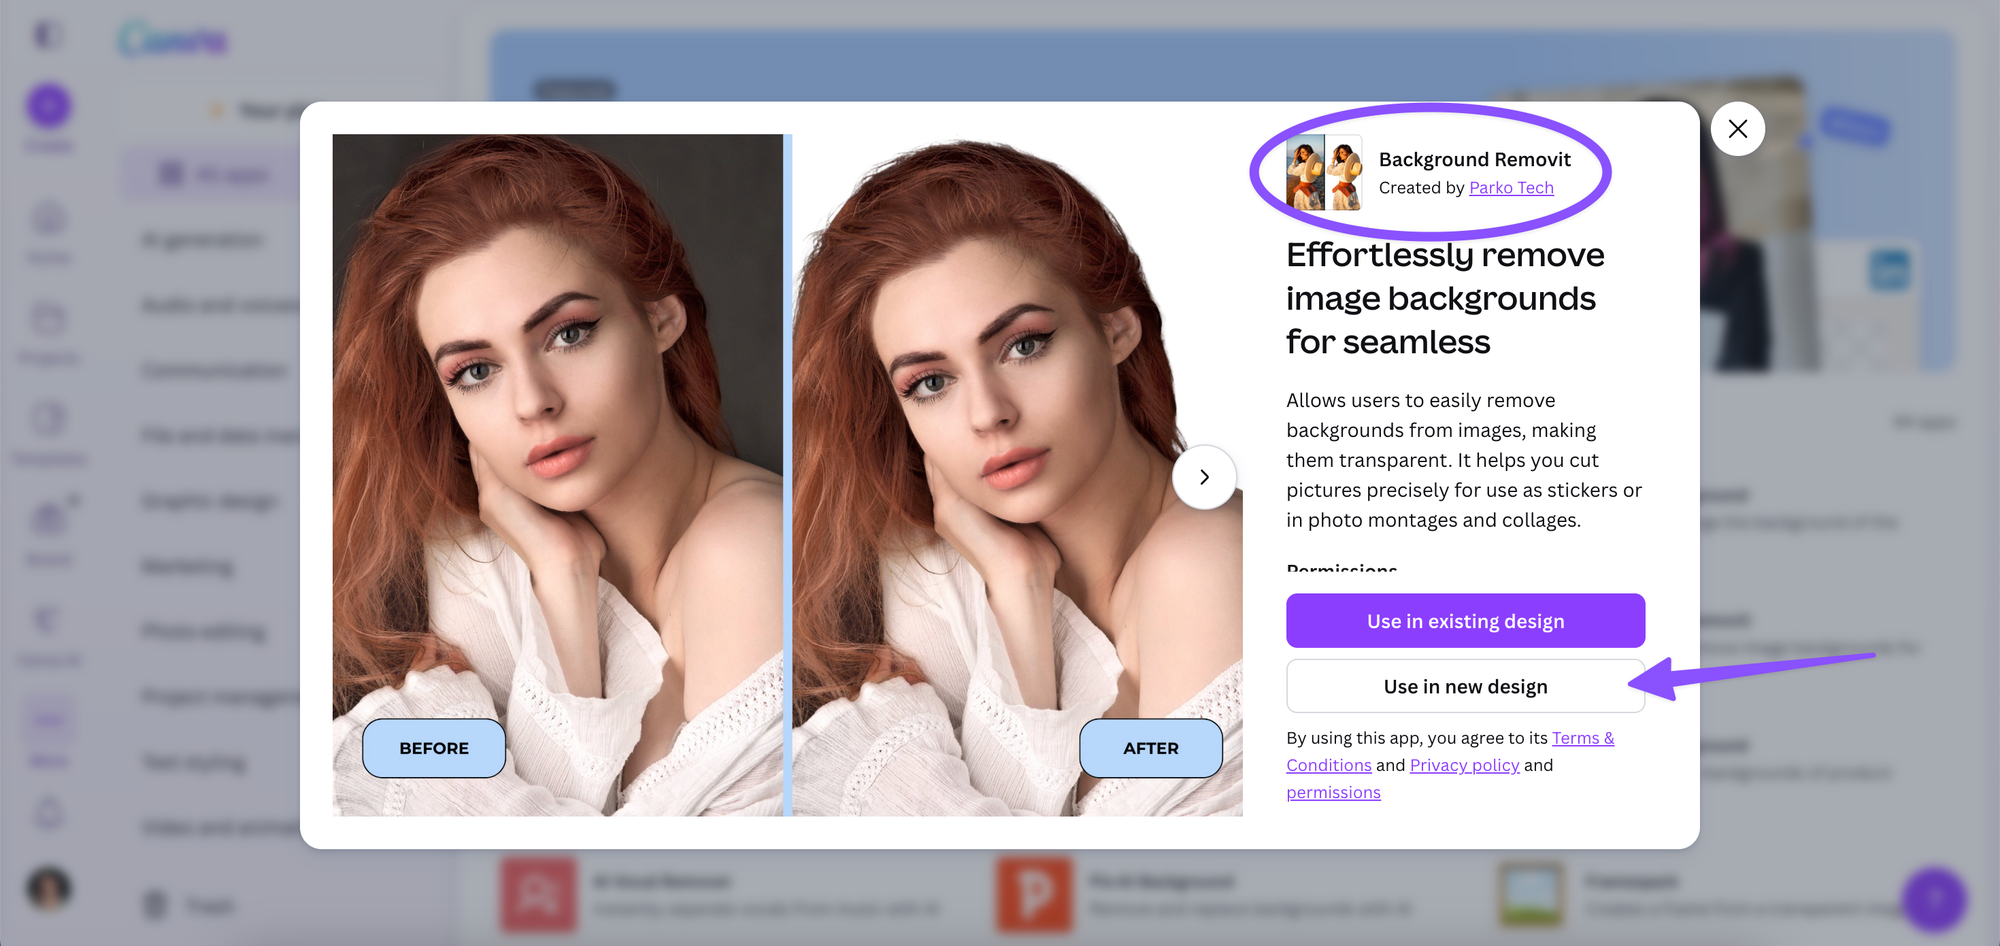
Step 3: Install and open the app
Click on the app and select Use in new (or existing) design. It'll open directly in your Canva sidebar.
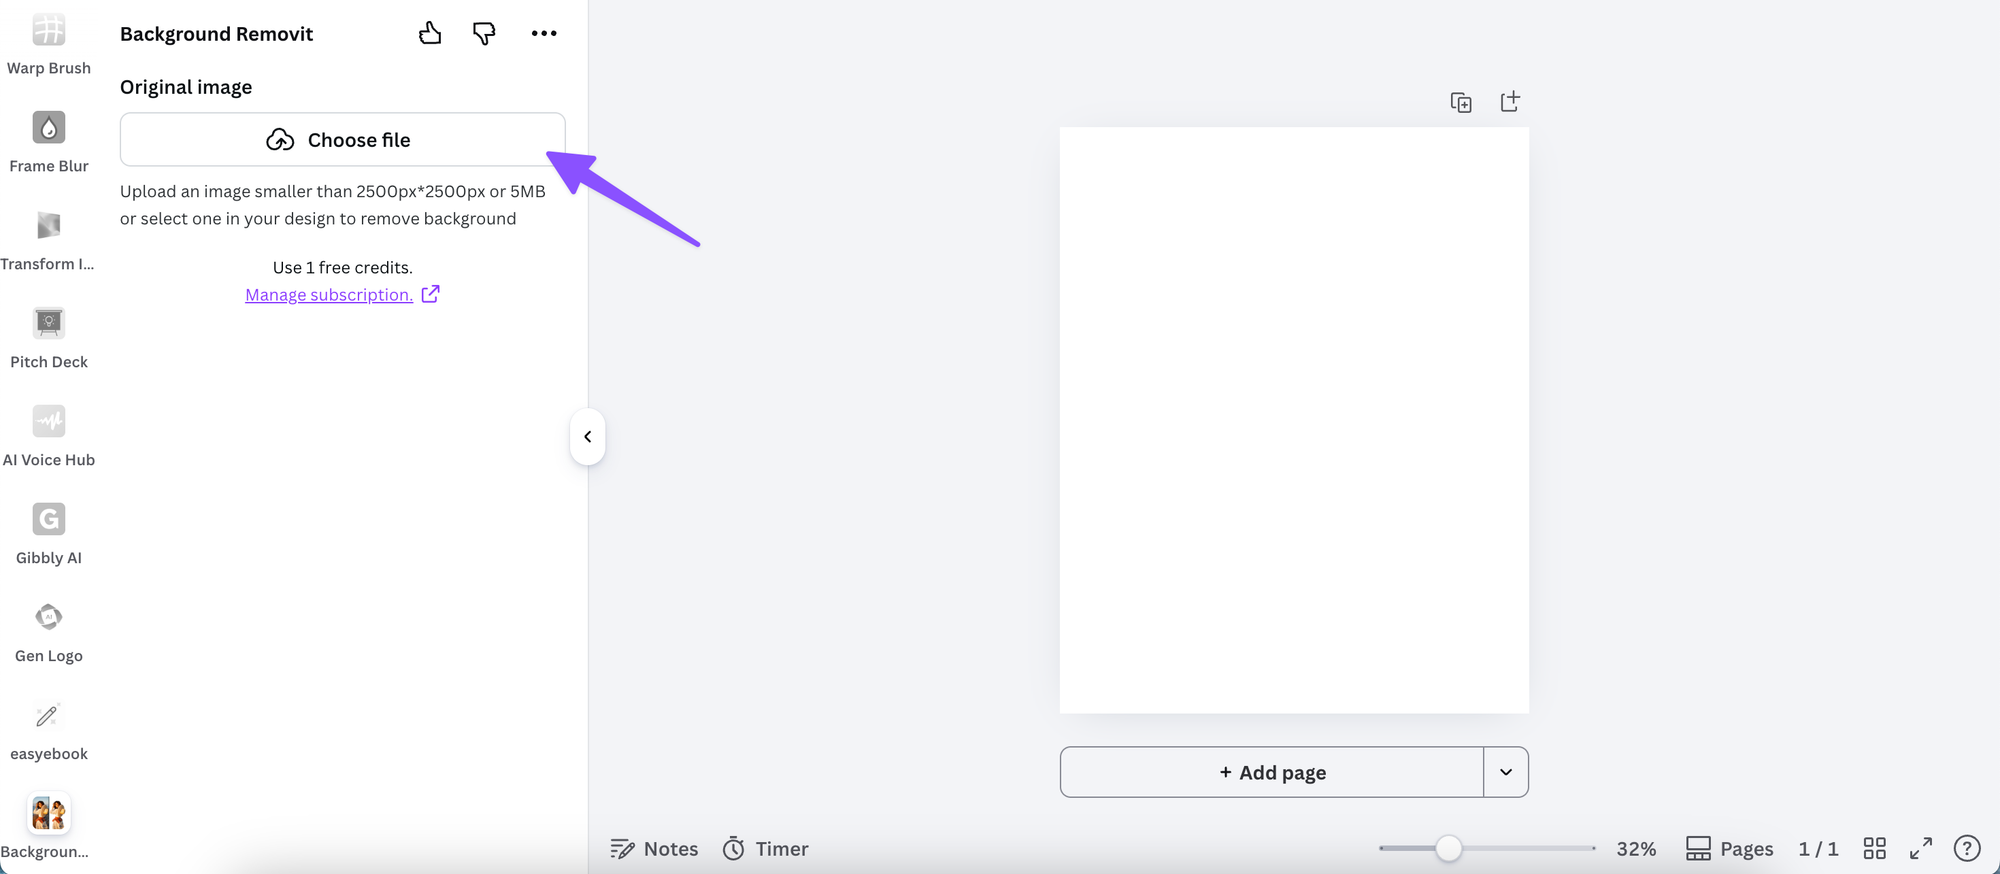
Step 4: Upload or select your image
Depending on the app, you can either upload an image from your device or select one from your Canva media library. The app processes it and returns the background-free version.
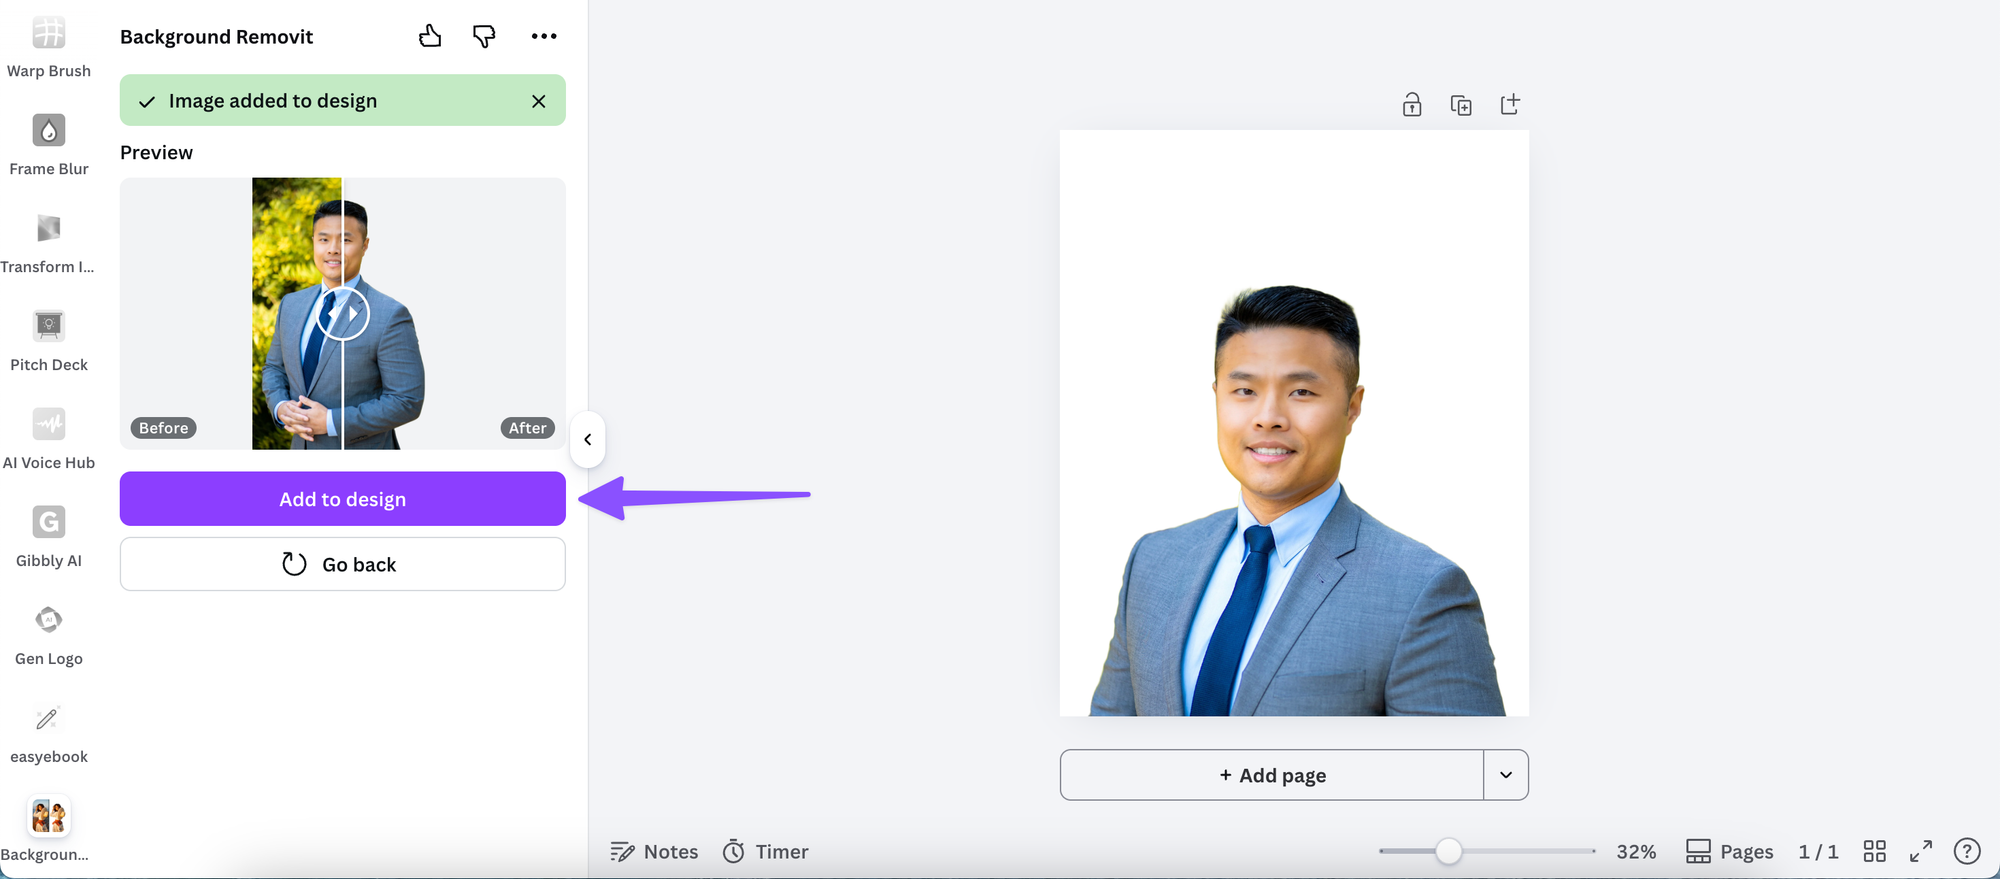
Step 5: Add to your design
Once the background is removed, click to add the image directly to your Canva canvas. From there, you can resize, reposition, and use it exactly as you would any other element.
Tips for Getting the Best Results
Background removal tools work best under certain conditions. A few things worth knowing before you start:
Use images with clear contrast between the subject and background. A person photographed against a plain white or solid-colour wall will give you a much cleaner result than someone photographed against a busy, patterned backdrop.
Shoot on a light, solid background when possible. If you have any control over how photos are taken, a plain background makes removal significantly faster and more accurate.
Zoom in when refining edges. When using the Erase and Restore brushes to clean up the result, zoom into your canvas first. It gives you much more control around fine details like hair, jewellery, or product edges.
Save your background-free image to your media library. Once you've removed the background, download the image as a PNG (which preserves the transparent background) and re-upload it to your Canva media library. That way it's ready to use across future designs without repeating the process.
What to Do With Your Background-Free Images
Once you have clean, background-free assets, a whole range of design options open up. Some of the most effective uses for business owners:
Product shots on branded backgrounds. Drop your product onto a solid colour or gradient that matches your brand palette for polished, consistent promotional content.

Headshots in social graphics. A background-free headshot layered over a designed template feels far more intentional than a photo with a random background behind it.

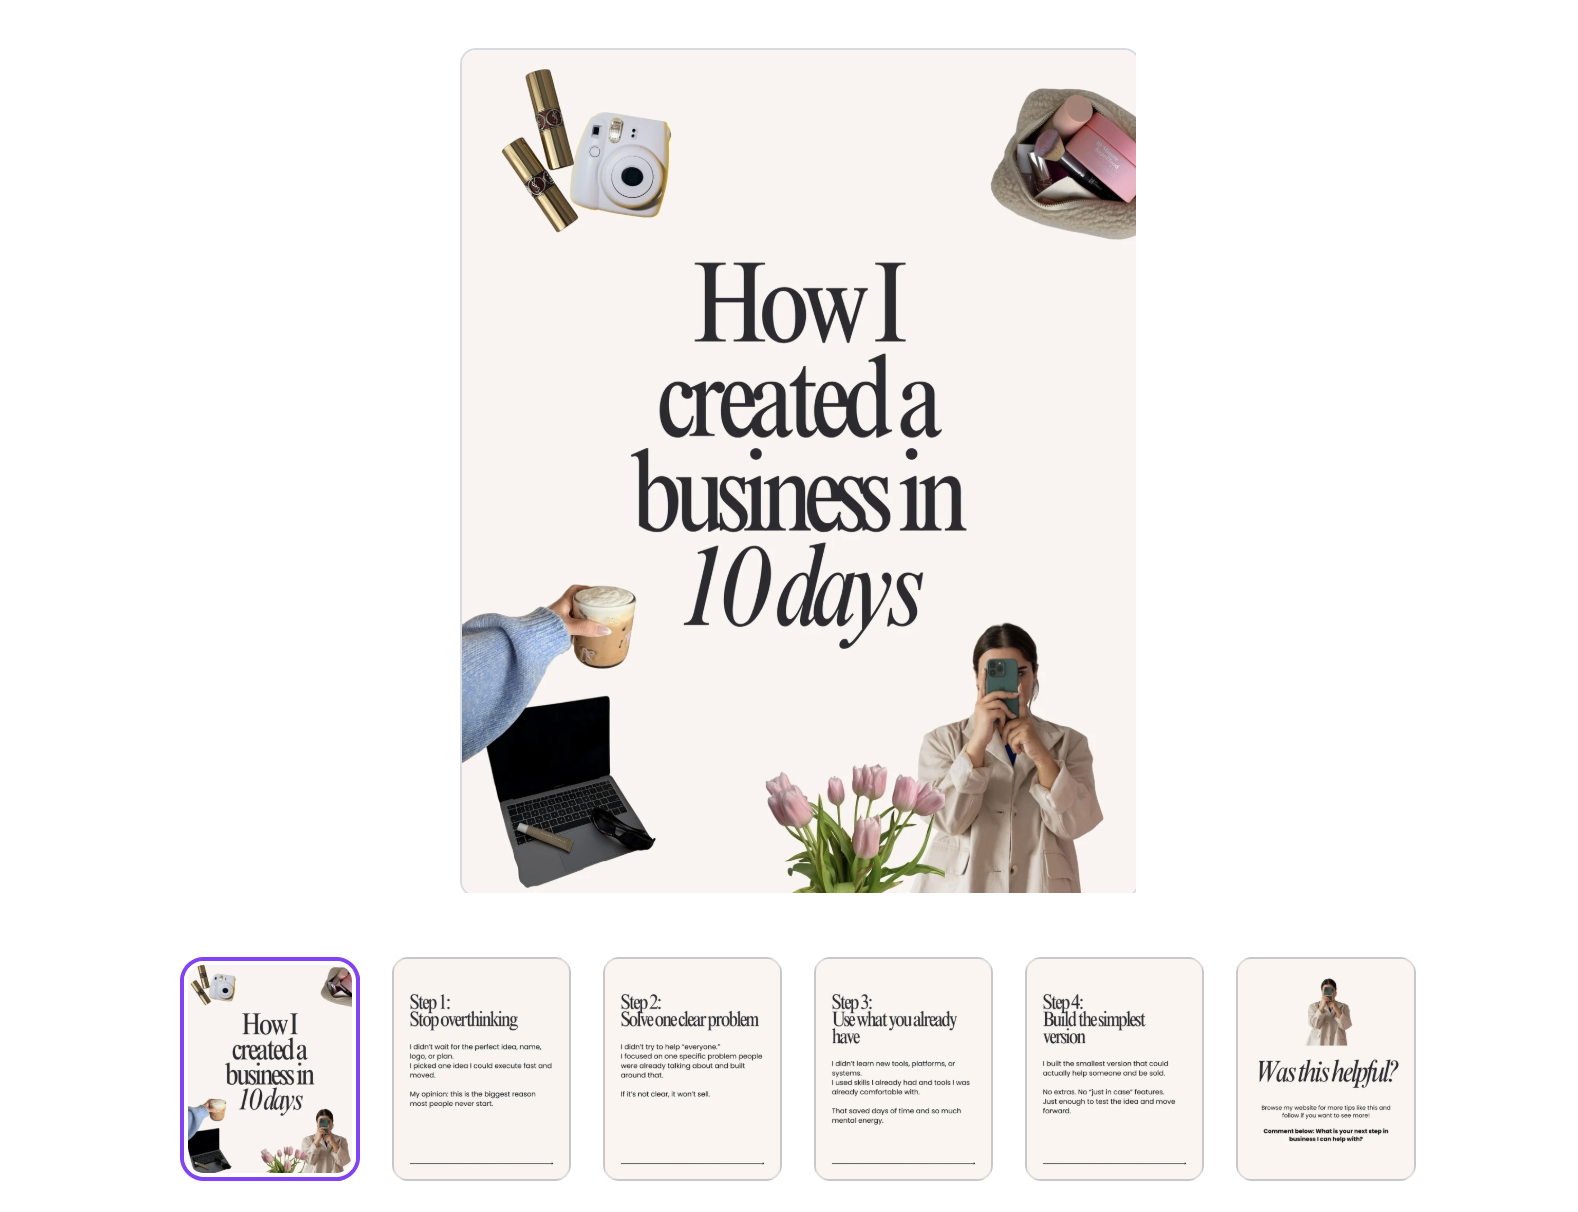
Carousel slides. Clean subject images work especially well across multi-slide carousel posts, where visual consistency between slides matters. Tools like Carousel Studio let you generate carousel layouts inside Canva and drop in your polished, background-free assets to build posts that look professionally designed.
Mockups and promotional graphics. Place your product, device screen, or packaging asset into a lifestyle image or scene to create realistic-looking promotional content without a photoshoot.
Frequently Asked Questions
Is background removal free in Canva?
Canva's built-in Background Remover tool is a Canva Pro feature, so it requires a paid plan. However, there are free third-party background removal apps available in the Canva App Marketplace that free plan users can access instead.
What file format should I download my background-free image as?
Always download as PNG. PNG files support transparency, which means the removed background stays transparent when you use the image in other designs. Downloading as JPG will fill the transparent areas with a white background.
Why does the background removal leave rough edges?
Automatic background removal tools can struggle with fine details like flyaway hair, fur, or intricate product edges. Using the Erase and Restore brush tools to manually refine those areas usually produces a much cleaner result. Zooming in before refining makes the process easier and more precise.
Can I remove a background from a logo in Canva?
Yes. The same process applies to logos and other graphics. For logos with clean lines, the automatic removal typically works well. For more detailed or illustrated logos, you may need to do some manual refinement using the Erase brush.
Can I use background removal on videos in Canva?
Canva Pro includes a background removal feature for videos as well as images. The process is similar: select your video clip, open the editing panel, and apply the background remover. It works best on footage with good lighting and clear contrast between the subject and background.
Will removed backgrounds stay transparent when I use the image in another design?
Yes, as long as you save and re-upload the image as a PNG. If you remove the background and immediately use the image within the same Canva design, the transparency is preserved automatically. The key step is choosing PNG when you download, to maintain that transparency outside of Canva.